> ## Documentation Index
> Fetch the complete documentation index at: https://unstructured-53-docs-245-multimodal.mintlify.site/llms.txt
> Use this file to discover all available pages before exploring further.
# Overview
If you do not have a destination location for Unstructured to send its processed data, skip over to the
[Pinecone destination connector quickstart](/ui/destinations/pinecone-destination-quickstart). This quickstart
guides you through the process of creating a free Pinecone account
and creating a destination connector to connect Unstructured to a Pinecone dense serverless index within your Pinecone account.
If you're new to Unstructured, read this note first.
Before you can create a destination connector, you must first sign in to your Unstructured account:
* If you do not already have an Unstructured account, [sign up for free](https://unstructured.io/?modal=try-for-free). After you sign up, you are automatically signed in to your new Unstructured **Let's Go** account, at [https://platform.unstructured.io](https://platform.unstructured.io).
To sign up for a **Business** account instead, [contact Unstructured Sales](https://unstructured.io/?modal=contact-sales), or [learn more](/ui/overview#how-am-i-billed%3F).
* If you already have an Unstructured **Let's Go**, **Pay-As-You-Go**, or **Business SaaS** account and are not already signed in, sign in to your account at
[https://platform.unstructured.io](https://platform.unstructured.io). For other types of **Business** accounts, see your Unstructured account administrator for sign-in instructions,
or email Unstructured Support at [support@unstructured.io](mailto:support@unstructured.io).
After you sign in, the [Unstructured user interface](/ui/overview) (UI) appears, which you use to create your destination connector.
After you create the destination connector, add it along with a
[source connector](/ui/sources/overview) to a [workflow](/ui/workflows). Then run the worklow as a
[job](/ui/jobs). To learn how, try out the [hands-on UI quickstart](/ui/quickstart#remote-quickstart) or watch the 4-minute
[video tutorial](https://www.youtube.com/watch?v=Wn2FfHT6H-o).
You can also create destination connectors with the Unstructured API.
[Learn how](/api-reference/workflow/destinations/overview).
If you need help, email Unstructured Support at [support@unstructured.io](mailto:support@unstructured.io).
You are now ready to start creating a destination connector! Keep reading to learn how.
Destination connectors in Unstructured are designed to specify the endpoint for data processed within the platform. These connectors ensure that the transformed and analyzed data is securely and efficiently transferred to a storage system for future use, often to a vector database for tasks that involve high-speed retrieval and advanced data analytics operations.
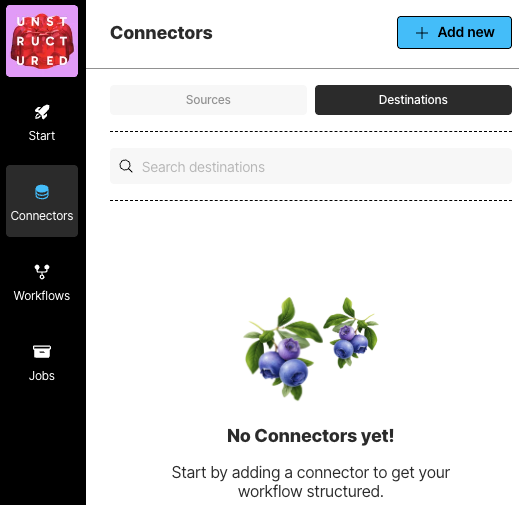 To see your existing destination connectors, on the sidebar, click **Connectors**, and then click **Destinations**.
To create a destination connector:
1. In the sidebar, click **Connectors**.
2. Click **Destinations**.
3. Cick **New** or **Create Connector**.
4. For **Name**, enter some unique name for this connector.
5. In the **Provider** area, click the destination location type that matches yours.
6. Click **Continue**.
7. Fill in the fields according to your connector type. To learn how, click your connector type in the following list:
* [Astra DB](/ui/destinations/astradb)
* [Azure AI Search](/ui/destinations/azure-ai-search)
* [Azure Blob Storage](/ui/destinations/azure-blob-storage)
* [Couchbase](/ui/destinations/couchbase)
* [Databricks Volumes](/ui/destinations/databricks-volumes)
* [Delta Tables in Amazon S3](/ui/destinations/delta-table)
* [Delta Tables in Databricks](/ui/destinations/databricks-delta-table)
* [Elasticsearch](/ui/destinations/elasticsearch)
* [Google Cloud Storage](/ui/destinations/google-cloud)
* [IBM watsonx.data](/ui/destinations/ibm-watsonxdata)
* [Kafka](/ui/destinations/kafka)
* [Milvus](/ui/destinations/milvus)
* [MongoDB](/ui/destinations/mongodb)
* [MotherDuck](/ui/destinations/motherduck)
* [Neo4j](/ui/destinations/neo4j)
* [OneDrive](/ui/destinations/onedrive)
* [OpenSearch](/ui/destinations/opensearch)
* [Pinecone](/ui/destinations/pinecone)
* [PostgreSQL](/ui/destinations/postgresql)
* [Qdrant](/ui/destinations/qdrant)
* [Redis](/ui/destinations/redis)
* [S3](/ui/destinations/s3)
* [Snowflake](/ui/destinations/snowflake)
* [Weaviate](/ui/destinations/weaviate)
8. If a **Continue** button appears, click it, and fill in any additional settings fields.
9. Click **Save and Test**.
To see your existing destination connectors, on the sidebar, click **Connectors**, and then click **Destinations**.
To create a destination connector:
1. In the sidebar, click **Connectors**.
2. Click **Destinations**.
3. Cick **New** or **Create Connector**.
4. For **Name**, enter some unique name for this connector.
5. In the **Provider** area, click the destination location type that matches yours.
6. Click **Continue**.
7. Fill in the fields according to your connector type. To learn how, click your connector type in the following list:
* [Astra DB](/ui/destinations/astradb)
* [Azure AI Search](/ui/destinations/azure-ai-search)
* [Azure Blob Storage](/ui/destinations/azure-blob-storage)
* [Couchbase](/ui/destinations/couchbase)
* [Databricks Volumes](/ui/destinations/databricks-volumes)
* [Delta Tables in Amazon S3](/ui/destinations/delta-table)
* [Delta Tables in Databricks](/ui/destinations/databricks-delta-table)
* [Elasticsearch](/ui/destinations/elasticsearch)
* [Google Cloud Storage](/ui/destinations/google-cloud)
* [IBM watsonx.data](/ui/destinations/ibm-watsonxdata)
* [Kafka](/ui/destinations/kafka)
* [Milvus](/ui/destinations/milvus)
* [MongoDB](/ui/destinations/mongodb)
* [MotherDuck](/ui/destinations/motherduck)
* [Neo4j](/ui/destinations/neo4j)
* [OneDrive](/ui/destinations/onedrive)
* [OpenSearch](/ui/destinations/opensearch)
* [Pinecone](/ui/destinations/pinecone)
* [PostgreSQL](/ui/destinations/postgresql)
* [Qdrant](/ui/destinations/qdrant)
* [Redis](/ui/destinations/redis)
* [S3](/ui/destinations/s3)
* [Snowflake](/ui/destinations/snowflake)
* [Weaviate](/ui/destinations/weaviate)
8. If a **Continue** button appears, click it, and fill in any additional settings fields.
9. Click **Save and Test**.